Factors That Impact Your Motorhome's Price and Resale Value

Mainline Truck Team • August 5, 2024

Whether you're a seasoned RVer looking to upgrade or a first-time owner considering future resale, understanding the factors that influence your motorhome's resale value is essential. The RV market, like any other, is subject to fluctuations, but certain elements consistently affect the price your RV can command. From age and mileage to brand reputation and upgrades, here are the aspects that impact your motorhome's resale value, and how to find the best RV service and repair to get the best resale value when the time comes.


Motorhome's Age 

The age of your motorhomeis a primary factor that affects its resale value. Generally, newer RVs tend to retain their value better than older ones. However, it's important to note that the rate of depreciation varies depending on the make, model, and overall condition. Well-maintained RVs can hold their value even as they age, while neglected ones will depreciate faster.


Mileage 

Similar to cars, mileage plays a crucial role in determining an RV's resale value. Lower mileage generally translates to higher value. RVs that have been used sparingly are often considered more desirable due to less wear and tear on the engine and other components. However, don't be discouraged if your RV has higher mileage, as meticulous maintenance records can offset this factor.


Economic Conditions and Market Trends

The overall economic climate and current market trends can significantly influence RV resale values. During economic downturns, demand for luxury items like RVs might decrease, leading to lower prices. Conversely, in prosperous times, demand might surge, driving prices up. It's essential to stay informed about the broader economic landscape and how it might affect the RV market. Researching recent sales data for comparable RVs can provide valuable insights into current market trends and help you set realistic expectations for your motorhome's resale value.


Seasonality and Timing

The time of year you choose to sell your RV can also impact its resale value. Typically, demand for RVs peaks during the spring and summer months when people are eager to embark on road trips and vacations. Selling during these peak seasons might yield better offers. However, if you're not in a rush, waiting for the off-season might attract buyers looking for deals, although you might not get the highest possible price. Consider your priorities and timeline when deciding when to list your RV for sale.


Location and Regional Factors

The geographic location where you're selling your RV can play a role in its resale value. RVs located in popular tourist destinations or areas with a strong RVing culture might command higher prices due to increased demand. Conversely, RVs in less popular areas might have a smaller pool of potential buyers, potentially affecting the final sale price. Researching local market trends and understanding the demand in your region can help you price your RV competitively.


Financing Options and Warranties

Offering flexible financing options can make your RV more appealing to potential buyers. If you're willing to finance a portion of the sale or offer a competitive interest rate, it might attract buyers who might not have the full purchase price upfront. Additionally, if your RV is still under warranty, highlighting this fact can be a significant selling point, providing buyers with added peace of mind.


Pre-Sale Inspections and Certifications

Investing in a pre-sale inspection by a certified RV technician can instill confidence in potential buyers. A detailed inspection report that highlights the RV's condition and any necessary repairs can alleviate concerns and justify your asking price. 


Condition and Maintenance 

The condition of your motorhome is arguably the most influential factor in its resale value. A well-maintained RV with a clean interior, functional appliances, and a sound mechanical system will undoubtedly attract higher offers than one that shows signs of neglect. Regular maintenance and repairs are essential to preserving your RV's value.


The Role of Maintenance and Records 

Keeping detailed maintenance records is not just good practice; it can significantly boost your RV's resale value. These records serve as proof of responsible ownership and provide potential buyers with confidence in the vehicle's history. Documentation of regular oil changes, tire rotations, appliance servicing, and other repairs demonstrates that you've invested in the RV's longevity.


Exterior and Interior Condition 

The visual appeal of your motorhome matters. A well-maintained exterior with a clean paint job, intact decals, and minimal signs of wear can make a positive first impression. Similarly, a clean and organized interior with functional appliances and comfortable furnishings can enhance the RV's appeal.


Brand and Model 

The brand and model of your RV can significantly impact its resale value. Certain brands have established reputations for quality, durability, and innovation, which translates to higher demand and better resale value. Popular models that are known for their reliability and features also tend to retain their value better.


Popularity and Reputation 

Just like any consumer product, RVs go through cycles of popularity. Models that are in high demand at the time of resale might fetch better prices than those that have fallen out of favor. Additionally, models with a reputation for issues might depreciate faster than those known for their dependability.


Features and Amenities 

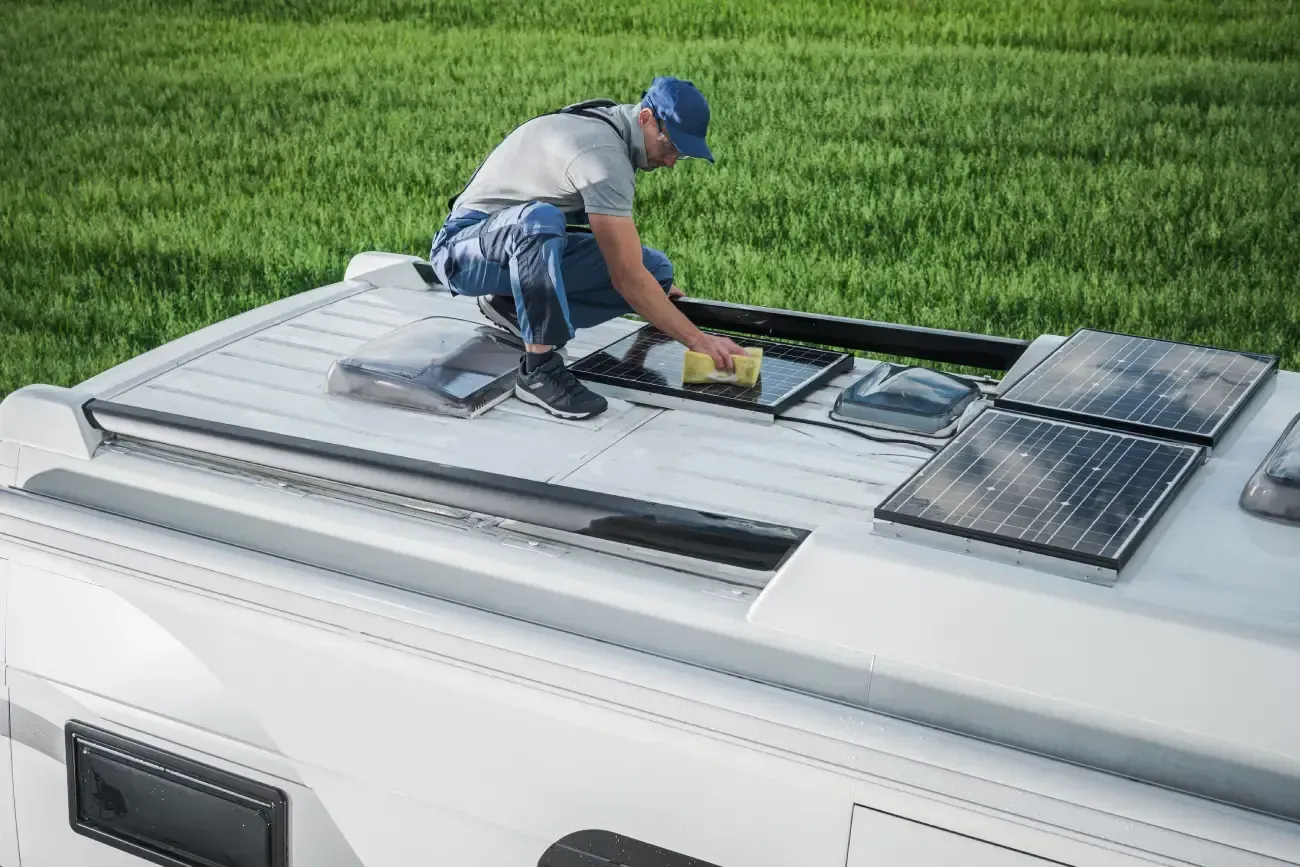
The features and amenities your motorhome offers can be a major selling point for some buyers. Modern conveniences like upgraded appliances, entertainment systems, solar panels, and advanced safety features can make your RV more appealing to buyers, potentially increasing its resale value.


Upgrades and Modifications 

While personal touches can make your RV feel like home, excessive or poorly executed modifications might not always translate to higher resale value. Some upgrades, like solar panels and improved suspension, can be seen as valuable additions, but overly personalized modifications might not appeal to a wider audience.


Value Added Upgrades 

Consider upgrades that offer practical value and enhance the overall experience. Upgrading to energy-efficient appliances, adding insulation for better temperature regulation, or installing a reliable inverter for off-grid power can be seen as valuable investments that might increase the resale value.

Ask about value-adding upgrades

Potential Drawbacks of Excessive Modifications 

While some modifications can be beneficial, it's important not to go overboard. Overly personalized modifications might limit the pool of potential buyers and make it harder to sell your RV. Additionally, poorly executed modifications could raise concerns about the vehicle's structural integrity or functionality.


Regular Cleaning and Detailing 

Keeping your RV clean, both inside and out, is crucial for maintaining its resale value. Regular washing, waxing, and interior cleaning not only make the RV more visually appealing but also prevent dirt and grime from causing long-term damage.


Proper Storage 

When not in use, proper storage can protect your RV from the elements and prevent unnecessary wear and tear. Consider storing your RV in a covered area or using a protective cover to shield it from sun damage, rain, and snow.


Addressing Minor Issues Promptly 

Don't neglect minor repairs. Addressing small issues as they arise can prevent them from escalating into major problems that could significantly impact your RV's value. Regular inspections and timely repairs can save you money in the long run.


Depreciation and Market Trends 

Like any vehicle, RVs depreciate over time. Understanding the typical depreciation curve for your specific make and model can help you set realistic expectations for resale value. Additionally, staying informed about market trends can give you insights into current demand and pricing.


Professional Inspections 

Before listing your RV for sale, consider getting a professional inspection. A thorough inspection can identify any underlying issues that might not be obvious and provide you with a comprehensive assessment of your RV's condition. This information can be valuable when negotiating with potential buyers.


Marketing and Presentation 

When it's time to sell, present your RV in the best possible light. Take high-quality photos that showcase its features and cleanliness. Write a compelling description that highlights its strengths and amenities. Consider listing it on reputable RV marketplaces and social media platforms to reach a wider audience.


Schedule maintenance to protect your RV's value


Negotiating with Buyers 

Be prepared to negotiate with potential buyers. Research comparable listings to understand the fair market value of your RV. Be open to reasonable offers, but don't undervalue your vehicle. Remember that a well-maintained RV with a documented history can command a premium price.


Contact Mainline RV & Truck Service for RV Service and Repair 

At Mainline RV & Truck Service, we understand the importance of maintaining your RV's resale value. Our technicians provide the best RV service and repair to keep your motorhome in top condition. From routine maintenance to major repairs, we have the expertise to ensure your RV runs smoothly and retains its value for years to come. Contact us to learn more and schedule a service appointment.


Thinking of selling or upgrading your RV? Let’s talk

FAQs

  • Do motorhomes generally hold their value well over time?

    Motorhomes, like all vehicles, depreciate over time, but well-maintained units retain value better. Newer RVs (less than 5 years old) typically hold value well, while older models depreciate more slowly. Travel trailers often hold value slightly better than motorhomes. Regular maintenance and upgrades can further enhance resale value

  • How much does a motorhome depreciate in the first few years?

    Motorhomes can lose 20–30% of their value in the first year. After three years, depreciation may reach 30% or more. The rate varies by type, usage, and condition. Class A motorhomes depreciate faster than smaller units. Proper care and maintenance can mitigate some depreciation, but significant loss is inevitable in the early years

  • Does regular maintenance play a significant role in a motorhome holding its value?

    Yes, regular maintenance is crucial for preserving value. It prevents major issues, ensures safety, and maintains appearance. Documented maintenance records demonstrate care, which can attract buyers. Neglected units depreciate faster due to perceived risk and potential repair costs. Maintenance includes engine checks, seal inspections, and appliance servicing

  • Should I upgrade my RV before selling?

    Strategic upgrades (e.g., new tires, updated appliances, or suspension enhancements) can increase resale value. However, avoid over-investing. Focus on cosmetic improvements and functional upgrades that appeal to buyers. Consult a professional to prioritize cost-effective upgrades that offer the best return on investment

  • Are there certain features that make a motorhome more attractive to potential buyers?

    Buyers often seek reliable engines, quality appliances, modern interiors, and features like solar panels or upgraded suspensions. Energy efficiency and low mileage are also attractive. Ensure all systems are functional and well-maintained. Documentation of maintenance and upgrades adds credibility and appeal

Contact Us
July 20, 2026
There is nothing worse than pulling into a sunny campsite, cranking up the AC, and getting blasted with warm air. When you're parked in direct sunlight, a motorhome can turn into an oven in minutes. Understanding how your cooling system operates helps you spot minor issues before they turn into expensive repairs. While complex electrical or refrigerant problems require a professional motorhome repair service, you can easily troubleshoot several common issues on your own. Running Your AC on Generator Power: Electrical Load Management Many owners encounter air conditioning issues when trying to run their units away from shore power. Your air conditioner consumes more electricity than almost any other appliance in your vehicle. Managing this electrical load incorrectly can cause your unit to shut down or damage its electrical components. An air conditioner requires starting wattage (the brief surge to start the compressor) and running wattage (the steady power to keep it going). If you are boondocking, your generator must handle both. To keep from tripping breakers, keep an eye on these specific power draws: Total Wattage Capacity: A standard 13,500 BTU RV air conditioner requires about 2,800 to 3,000 watts to start and 1,500 to 2,000 watts to run. Competing Appliances: You cannot run everything at once. A microwave uses 1,000 to 1,500 watts, while an electric water heater draws around 1,400 watts. The Power Converter: Your onboard converter constantly draws 300 to 800 watts to charge your house batteries. When your generator stalls, surges, or chokes the second the AC kicks on, the issue is likely under the generator's hood. Staying on top of regular maintenance is what keeps your power source responsive. If you notice erratic power delivery, you may need a professional Onan generator repair to clean the carburetor, adjust the governor, or replace worn parts. Why Your RV AC Freezes Up: Airflow vs. Low Refrigerant If you notice the airflow dropping or the cabin getting warmer by the hour, take a look at the unit; it might actually be frozen. Once ice builds up on those cooling coils, it chokes off the airflow entirely. While owners often assume low refrigerant is the culprit, a lack of adequate airflow is the most common cause of ice. The Role of Airflow Your air conditioner pulls warm, humid air from your cabin across cold evaporator coils. If air moves too slowly, the moisture condensing on the coils drops below 32 degrees Fahrenheit and turns to ice. Common airflow issues include: Low Fan Speed: Running your fan on "Low" during highly humid days can freeze the coils. Closed Registers: Closing too many ceiling vents restricts the volume of air moving through the system. A Misaligned Air Divider: If the thin foam divider separating the warm return air from the cold supply air slips out of place, cold air leaks directly back into the return side. Low Refrigerant Levels If your filters are clean, your vents are open, and your fan is running on high, you may have low refrigerant. Modern RV air conditioners are sealed systems that do not consume refrigerant over time. A low level means a physical leak exists. Unlike a home system, you cannot simply add more Freon because RV units lack service ports. Fixing a leak requires a certified RV repair shop to cut into the lines, install service valves, patch the leak, and recharge the system. The Fan Hums but Won't Spin: Checking the Capacitor If you turn on your thermostat and hear a humming sound from the roof but no air blows through the vents, you are likely dealing with a failed capacitor. Think of capacitors as tiny batteries that store up electricity and dump it in a quick burst to kick-start those heavy motors. Between blistering summer heat and sudden power surges, these parts take a beating over time. When a capacitor fails, the fan motor sits in place and emits a low electrical hum. You can perform a quick visual inspection: Disconnect Power: Turn off the air conditioner at the thermostat, shut off the main breaker inside the RV, and unplug the shore power cord. Remove the Shroud: Go onto the roof of your vehicle and remove the plastic outer cover of the AC. Locate the Electrical Box: Open the metal access panel protecting the wiring. Inspect for Damage: A healthy capacitor is a perfect cylinder. If the top is bulging, domed, or leaking oily fluid, the component has failed and must be replaced. Capacitors can hold a dangerous electrical charge even after you disconnect the power. If you are uncomfortable handling high-voltage components, it is safest to bring your vehicle to a professional RV repair shop. Maximizing Efficiency: Cleaning the Filter and Evaporator Coils Regular preventative maintenance is the simplest way to extend the lifespan of your cooling system. Dust, pet dander, and outdoor debris create a thermal barrier that reduces cooling efficiency. Cleaning the Return Air Filter Your return air filter sits just behind the ceiling grill inside your living space. Inspect this filter every two weeks during periods of heavy use. Remove the plastic grill cover. Take out the foam or mesh filter element. Wash the filter in a sink using warm water and mild dish soap. Allow the filter to dry completely before reinstalling it. Cleaning the Coils Your system contains two sets of metal fins that must remain clean: the evaporator coils inside the vehicle and the condenser coils on the roof. Evaporator Coils: Access these from inside the cabin or by removing the internal shroud on the roof. Gently vacuum away loose dust and spray self-rinsing coil cleaner onto the aluminum fins. Condenser Coils: Located on the roof, these coils gather leaves, dirt, and insects. Spray them with a heavy-duty coil cleaner, let it sit for ten minutes, and rinse the fins gently with a low-pressure garden hose. Never use a high-pressure power washer, as it will bend the delicate aluminum fins. Contact Our RV Repair Shop Today Chasing down AC problems gets complicated fast, especially when you start messing with rooftop wiring, control boards, or sealed lines. Plus, letting a malfunctioning unit run can overheat the compressor, turning a cheap fix into a massive replacement bill. If your motorhome stays warm despite your troubleshooting efforts, the experienced technicians at Mainline RV & Truck Service are ready to assist you. We operate a 16,000-square-foot facility equipped with modern diagnostic tools to handle everything from standard maintenance to complex electrical overhauls. Don't let a failing air conditioner ruin your summer travel plans. Contact Mainline RV & Truck Service today to schedule your service appointment.
July 20, 2026
Ask any veteran road-tripper, and they’ll tell you the same thing: water is your rig’s absolute worst enemy. Whether you're driving a luxury Class A motorhome or towing a lightweight travel trailer, a microscopic tear in your roof's protective layer is all it takes for rainwater to quietly seep in and destroy your walls, ceiling, and subflooring. By the time you spot a water stain inside your living space, the structural damage is already done. Wood rot, ruined insulation, and toxic mold growth are highly expensive to fix. At Mainline RV & Truck Service , we perform expert RV repair and motorhome repair service. We see firsthand how fast a neglected roof destroys a great vehicle. Protecting your investment is straightforward. You must understand how your roof seals, know how to inspect it, and ensure it gets resealed before a leak begins. Why Annual Inspections Cost Less Than Major RV Repair Most RV manufacturers recommend inspecting your roof seals at least twice a year. If you park your rig under trees or travel through areas with extreme temperature shifts, you should check it even more often. Putting off these quick inspections to save a little time almost always backfires. The Cost of Prevention: A routine roof inspection and minor sealant touch-up is a basic maintenance expense. It takes a couple of hours and uses relatively inexpensive materials. The Cost of Neglect: If water penetrates your roof membrane, it rots the thin plywood decking underneath. Eventually, the entire roof must be peeled off, the wood replaced, and a new membrane laid down. This level of camper repair can easily cost thousands of dollars. Being proactive pays off. It keeps hard-earned cash in your pocket and ensures your rig stays out of the shop when you should be out enjoying camping season. Spotting "Alligatoring" and Cracks in Old Sealant Of course, catching a leak early means knowing exactly what to look for once you're up on the roof. When you climb up to inspect your roof, pay close attention to the joints. These are the areas where the roof membrane meets the front and rear caps, side transition moldings, vent pipes, skylights, and your ladder mounts. Watch out for these clear warning signs: Alligatoring: This is when the surface of your self-leveling lap sealant dries out, shrinks, and cracks in a pattern that resembles alligator skin. It means the oils in the sealant have dried out from solar exposure. Deep Cracking: Look for deep splits that go all the way down to the metal or plastic flange underneath. Peeling and Lifting: Gently press the edges of the sealant. If it lifts away from the roof membrane easily, water is already bypassing it. Pinholes: Small, bubble-like holes can form as sealant cures or ages, creating a direct path for moisture. If you notice any of these signs, the old sealant must be cleaned, prepped, and resealed. Lap Sealant vs. Tape: The Right Materials for EPDM and TPO Roofs You cannot grab a tube of cheap silicone from a local home improvement store and apply it to your RV roof. Silicone does not stick well to RV roof membranes and will peel off quickly under highway wind pressures. Most modern RVs use one of two rubber-like membranes: EPDM (Ethylene Propylene Diene Monomer): A synthetic rubber membrane. TPO (Thermoplastic Polyolefin): A blend of rubber and plastic polymers. Choosing the right sealants for these specific materials is vital to avoid chemically damaging your roof. Self-Leveling Lap Sealant This is the thick, liquid sealant used on flat, horizontal roof surfaces. When applied around vents, pipes, and skylights, it slowly spreads out and flattens to form a watertight barrier over screws and seams. For EPDM and TPO: Use high-quality, brand-name lap sealants specifically rated for RV rubber roofs (such as Dicor 501LSW). Never use silicone: Silicone leaves a residue that prevents any future RV sealant from bonding to the surface. Non-Sag Sealant On vertical surfaces, such as the side seams of your roof or around the top of your entry door, you must use non-sag sealant. This formula is thicker and stays exactly where you put it without running down the side of your RV. Micro-Sealant Tape Heavy-duty adhesive tape is excellent for long, straight seams, like the transition area where your roof membrane meets your front or rear fiberglass caps. The Pros: It creates an incredibly durable, long-lasting barrier that resists sunlight damage better than liquid sealants. The Cons: It is highly permanent. If you ever need to replace a vent or skylight in the future, removing micro-sealant tape is extremely difficult and can tear your roof membrane if done incorrectly. AC Gaskets: A Hidden Source of Ceiling Leaks Many RV owners carefully seal every vent and pipe but still end up with a wet ceiling. The culprit is almost always the air conditioner gasket. Your roof-mounted air conditioner does not use liquid lap sealant or tape to stay watertight. Instead, it sits over a square opening in your roof and seals against a thick, square foam gasket. This foam gasket prevents water from entering the cabin. Over time, several things can cause this seal to fail: Compressive Set: The heavy weight of the AC unit permanently squishes the foam over several years until it loses its springiness and fails to seal. Loose Mounting Bolts: RV air conditioners are held in place by four long bolts accessible from inside the RV (by removing the plastic ceiling assembly cover). Road vibrations can cause these bolts to back out over time. If the bolts loosen, the gasket relaxes, and rainwater will pour straight down your air ducts or drip from your ceiling shroud. Gasket Decay: Constant exposure to temperature extremes eventually causes the foam to rot and crumble. If your AC mounting bolts are loose, tightening them gently can sometimes stop a fresh leak. However, if the gasket is old, compressed, or dry-rotted, the entire AC unit must be lifted so a new foam gasket can be installed. Contact Mainline RV & Truck Service for RV Repairs Today Let's be honest: hauling yourself onto an RV roof isn't everyone's idea of a fun Saturday. It’s tough physical work that involves balancing on slick surfaces, scraping away stubborn old adhesive without gouging the delicate rubber membrane, and trying to apply the new sealant before the weather changes. If you are not comfortable working on your roof, or if your inspection reveals damage that is already too advanced for a quick DIY touch-up, let our professional team handle it. Mainline RV & Truck Service is your trusted partner for high-quality motorhome repair service and camper repair. Our certified technicians have the specialized tools, safety equipment, and premium materials needed to inspect, prep, and reseal your RV roof correctly. We identify hidden issues before they turn into costly structural repairs, ensuring your rig stays dry and road-ready for your next adventure. Don't wait for the next heavy rainstorm to test your seals. Contact Mainline RV & Truck Service today to schedule your professional RV roof inspection and resealing service!
July 14, 2026
A functioning slide-out is essential for the comfort and space of your RV. When you press the button and nothing happens, or worse, you hear a grinding noise, it can quickly ruin a camping trip. Understanding how your system works and how to maintain it can save you from being stranded with a rig you cannot drive. At Mainline RV & Truck Service , we see many owners struggle with slide-out failures that could have been prevented with basic upkeep. This guide will help you troubleshoot common issues and understand when it is time to visit a professional motorhome repair shop. Hydraulic vs. Electric Slide Systems: Knowing Your Rig Before you can fix a problem, you must know what type of system moves your slides. Most RVs, fifth wheels, and travel trailers use one of two primary technologies. Electric Slide Systems Electric systems use a 12-volt DC motor. These are common in smaller slides or travel trailers. They typically use a rack-and-pinion gear set, a cable system, or a worm gear (often called a Schwintek slide). Symptoms of Failure: Clicking sounds, uneven movement, or the motor running without the slide moving. Power Needs: These rely heavily on a healthy battery. If your battery voltage is low, the motor will struggle or fail to engage. Hydraulic Slide Systems Hydraulic systems are usually found on larger motorhomes and high-end fifth wheels. They use a pump and hydraulic fluid to push pistons that move the slides. These systems are powerful and can move multiple slides at once. Symptoms of Failure: Fluid leaks under the rig, jerky movements, or a loud whining noise from the pump. Maintenance Needs: You must regularly check fluid levels in the reservoir and inspect hoses for cracks or bulges. Knowing which system you have is the first step in travel trailer repair . If you are unsure, check your owner’s manual or look for a hydraulic fluid reservoir in your exterior compartments. Troubleshooting: Why Your Slide Won’t Move If your slide is stuck, do not keep holding the button. This can burn out the motor or damage the gears. Instead, run through this quick checklist: Check the Parking Brake: Many motorhomes have a safety lockout. The slide will not move unless the parking brake is engaged. Battery Voltage: Ensure you are plugged into shore power or that your house batteries are fully charged. Low voltage is the number one cause of electric slide failure. Look for Obstructions: Inside the RV, check for fallen items behind the trim. Outside, check for tree branches or debris on top of the slide roof. Blown Fuses: Locate your RV’s fuse panel and check for any blown fuses or tripped breakers related to the slide-out motor. Lubricating the Seals to Prevent Leaks and Sticking The rubber seals (wiper seals) around your slide-out serve two purposes. They keep water out and help the slide move smoothly. Over time, these seals can become dry, brittle, or "sticky." When a seal sticks to the side of the RV, the motor has to work much harder to break it loose. This can lead to motor burnout or torn seals. How to Maintain Your Seals: Clean the Seals: Use soap and water to remove dirt, sap, and road grime. Apply Seal Conditioner: Use a dedicated RV slide-out seal lubricant. Avoid petroleum-based products as they can degrade the rubber. Lubricate the Tracks: For electric rack-and-pinion systems, use a dry silicone lubricant on the metal tracks. Dry lube is essential because it does not attract road dust or sand, which can act like sandpaper on your gears. Inspect for Tears: If you see light coming through the corners when the slide is closed, your seals are compromised. This leads to water damage and floor rot. Regular lubrication is a key part of RV repair that owners can do at home to avoid expensive shop visits. Manual Override: How to Get the Slide in for the Drive Home If the motor or pump fails while your slide is extended, you cannot safely drive the vehicle. Every RV slide system has a manual override method. You should learn where yours is before an emergency happens. For Electric Systems Crank Extension: Many systems have a nut on the end of the motor or a dedicated shaft where you can attach a hand crank or a power drill with a socket. Motor Disengagement: Some systems require you to physically unscrew the motor or pop it out of the bracket to manually push the slide in. For Hydraulic Systems Manual Relief Valve: You will usually find a valve on the pump that can be opened with a hex key. Once opened, you may need a team of people to physically push the slide back into the rig. Hand Pumps: Some high-end systems include a manual hand pump integrated into the hydraulic manifold. Safety Warning: Slides are extremely heavy. Never attempt a manual override alone if it requires pushing the unit. Always lock the slide in place with "slide-out bars" or travel locks once it is retracted manually to ensure it doesn't drift out while you are driving. Scheduling Hydraulic Repairs at a Motorhome Repair Shop While basic lubrication and fuse checks are DIY-friendly, hydraulic systems and complex gear alignments require professional expertise. Hydraulic systems operate under immense pressure. A pinhole leak in a hose can be dangerous and cause the slide to drop or extend unexpectedly. Furthermore, if your slide is timing out, meaning one side moves faster than the other, it likely needs a professional synchronization or gear replacement. At Mainline RV & Truck Service, we provide specialized motorhome repair shop services, including: Hydraulic pump replacement and fluid flushes. Hose crimping and leak repair. Slide-out floor repair and structural reinforcement. Electronic control module troubleshooting. Professional intervention ensures that your slide-out remains square within the frame. If the box becomes crooked, it will eventually destroy the motor and the weather stripping, leading to thousands of dollars in water damage repairs. Contact Our Motorhome Repair Shop Today for Travel Trailer Repair Don't let a stuck slide-out ruin your next vacation. Whether you are dealing with a hydraulic leak, a burnt-out electric motor, or worn-out seals, the team at Mainline RV & Truck Service is here to help. We have the tools and experience to handle the heavy-duty requirements of RV and travel trailer repair. Contact Mainline RV & Truck Service today to schedule your maintenance or repair appointment.
June 30, 2026
For owner-operators and fleet managers in Cleveland, a commercial truck is more than just a vehicle. It is a livelihood. When your transmission begins to fail, it doesn't just threaten your schedule; it threatens your safety and your bottom line. Ignoring the early warning signs of gear grinding or clutch slippage usually leads to a total breakdown on the side of I-90 or I-71. Understanding how to recognize commercial clutch and transmission failure early can save you thousands of dollars in avoidable downtime. At Mainline RV & Truck Service , we specialize in high-stakes commercial truck repairs . We see firsthand how minor adjustments can prevent catastrophic failures if caught in time. The Mechanics of the Modern Commercial Transmission Commercial transmissions are engineered to handle massive torque and heavy payloads. Unlike passenger vehicles, these systems undergo extreme thermal stress and constant shifting. The synergy between the clutch, the pressure plate, and the internal gear sets must be perfect to maintain fuel efficiency and power delivery. When you hear a grind, you are hearing metal-on-metal contact that shouldn't be happening. This is often the final cry for help from a system that has been struggling for miles. Slipping Clutches: High RPMs and No Power One of the most common precursors to a full transmission failure is a slipping clutch. This is often more noticeable when the truck is under a heavy load or climbing a grade. What to look for: RPM Surges: You press the accelerator, and the tachometer climbs rapidly, but your road speed stays the same. Burning Smell: A slipping clutch generates intense heat. If you smell a pungent, burnt odor coming from the bell housing, the friction material is likely disintegrating. Lack of Bite: The clutch pedal may feel "soft" or engage much higher in its travel than it used to. If your engine is revving without providing the necessary torque to the wheels, your clutch is no longer effectively transferring power. Continuing to drive with a slipping clutch will eventually warp the flywheel, turning a standard clutch swap into a much more expensive truck repair. Hard Shifting: Is it Fluid or Hardware? If you find yourself "fighting" the gear stick or hearing a loud crunch every time you shift, you are experiencing hard shifting. This is a primary indicator of internal transmission distress. In our Cleveland semi-truck repair shop, we generally categorize hard shifting into two causes: fluid issues or synchronizer wear. 1. Low or Contaminated Fluid Transmission fluid serves three purposes: lubrication, cooling, and hydraulic pressure. If the fluid level is low, the internal components generate excessive friction. If the fluid is old, it loses its viscosity and ability to protect the gears. 2. Synchronizer Wear Synchronizers are responsible for matching the speed of the gear you are shifting into. When these wear down, the gears clash because they are spinning at different speeds. This results in the classic grinding gears sound. Linkage Adjustments: The Affordable Solution Not every grinding gear requires a full transmission rebuild. Sometimes, the problem exists outside of the gearbox itself. The linkage is the series of rods and cables that connect your shift lever to the transmission. Over time, these components can stretch, bend, or vibrate out of alignment. If the linkage is off by even a fraction of an inch, the transmission won't fully engage the gear. This causes the gear to pop out or grind during the shift. Why linkage checks matter: Cost-Effective: A linkage adjustment is a fraction of the cost of a transmission overhaul. Prevention: Proper alignment prevents "dog teeth" wear on the internal gears. Driver Comfort: Correct linkage makes for smoother shifting and less physical fatigue for the driver. Before you assume your transmission is shot, have a professional technician check the linkage and clutch brake adjustments. The Importance of Professional Transmission Diagnostics Modern commercial trucks are equipped with complex Electronic Control Units (ECUs). Many transmission issues are now triggered by sensor failures or solenoid malfunctions rather than mechanical gear breakage. A professional diagnostic involves more than just a test drive. It includes: Computerized Scanning: Retrieving fault codes that indicate specific solenoid or sensor failures. Fluid Analysis: Checking for metal shavings in the transmission pan, which indicates internal component disintegration. Pressure Testing: Ensuring the hydraulic system is maintaining the correct pressure to engage clutches and gears. Securing a diagnostic for commercial truck repairs early on is the best way to ensure your fleet stays on the road. Maintaining Your Drivetrain in Cleveland’s Climate Cleveland's weather puts unique stress on commercial transmissions. The constant shifting required in stop-and-go traffic on slushy or icy roads can lead to overheating. Additionally, road salt can corrode external linkages and slave cylinders. Regular inspections are the only way to combat the environmental wear-and-tear unique to the Great Lakes region. Whether you are hauling regional freight or operating a local delivery fleet, your transmission maintenance schedule should be a top priority. Contact Mainline RV & Truck Service for Commercial Truck Repairs If you are experiencing gear grinding, hard shifting, or clutch slippage, do not wait for a total failure. At Mainline RV & Truck Service, we provide expert truck repair services designed to get you back on the road quickly and safely. Our team understands the nuances of heavy-duty transmissions. We prioritize honest diagnostics, helping you determine if you need a simple linkage adjustment or a more comprehensive repair. We are the trusted name for Cleveland semi-truck repair, offering the technical expertise required for today’s complex commercial vehicles. Our Commercial Services Include: Clutch replacements and adjustments Transmission fluid flushes and filter changes Driveline and U-joint repairs Comprehensive electronic diagnostics Flywheel resurfacing Don't let a small grind turn into a major expense. Keep your truck moving and your business profitable. Contact us today to schedule your transmission diagnostic and commercial truck repairs.
June 30, 2026
When you are hauling heavy loads across long distances, your engine generates an immense amount of heat. The cooling system is the only thing standing between a productive day on the road and a catastrophic engine failure. At Mainline RV & Truck Service , we see how quickly a small cooling issue can escalate into a massive repair bill. Understanding how to troubleshoot your heavy-duty cooling system is essential for every fleet owner and operator. Efficient heat management ensures your engine runs within the optimal temperature range, preserving fuel economy and engine longevity. The High Stakes of Engine Temperature Management Heavy-duty engines are designed to operate under high pressure. However, they have a very low tolerance for overheating. When the cooling system fails, the internal temperatures of the engine block skyrocket. This leads to metal expansion beyond design limits. The most common result of chronic overheating is a cracked cylinder head. Replacing a head is a labor-intensive and expensive process that involves significant downtime. Regular heavy-duty truck service focuses on identifying weak points in the cooling circuit before they lead to these structural failures. Troubleshooting Thermostat Failures The thermostat is a small component that plays a massive role. It acts as a gatekeeper, regulating the flow of coolant between the engine and the radiator. When it fails, it usually does so in one of two ways: Stuck in the Closed Position: This is a critical failure. The coolant cannot reach the radiator to shed heat. Your temperature gauge will climb rapidly, often leading to an immediate overheat situation. Stuck in the Open Position: While less explosive, this causes the engine to run too cold. This prevents the engine from reaching its efficient operating temperature, leading to poor fuel mileage and increased soot buildup in the DPF system. If you notice erratic temperature fluctuations, it is time to have a commercial truck shop test your thermostat. Understanding Clutch Fan Issues Your truck’s cooling fan consumes a significant amount of horsepower. To save fuel, the clutch fan only engages when the engine reaches a specific temperature threshold. If your fan fails to engage, you will likely notice the truck stays cool while moving at highway speeds but begins to overheat when climbing grades or idling. Common signs of clutch fan failure include: The fan spinning freely with no resistance when the engine is off. The fan failing to "roar" or engage when the engine exceeds 200–210 degrees. Oil or fluid leaking from the fan clutch hub. A malfunctioning fan clutch puts unnecessary stress on the rest of the cooling system. If the air isn't being pulled through the radiator, the coolant cannot do its job. Why You Must Clean the Radiator Stack Heavy-duty trucks spend thousands of hours on highways and in industrial sites. Over time, the "stack," which includes the radiator, the charge air cooler (CAC), and the AC condenser, collects an incredible amount of debris. Dust, bugs, road salt, and plastic debris get sucked into the fins. This creates a physical barrier that prevents airflow. Even if your water pump and thermostat are working perfectly, a clogged radiator stack will cause the engine to run hot because there is no heat exchange happening. Cleaning Tips for Drivers: Visually inspect the front of the grill daily. Use low-pressure compressed air or water to blow out debris from the back toward the front. Avoid using high-pressure washers directly on the delicate fins, as this can bend them and permanently restrict airflow. The Role of Coolant Quality and Level It isn't just about the parts; it is about the fluid. Modern heavy-duty engines require specific Extended Life Coolants (ELC). Using the wrong coolant or mixing incompatible types can lead to "gelation," where the fluid turns into a thick sludge that plugs the radiator tubes. Furthermore, low coolant levels often point to a leak in the EGR cooler or a vibrating hose that has rubbed through. Small leaks might not leave a puddle on the ground because the fluid evaporates on the hot engine block. Keep a close eye on your reservoir levels during every pre-trip inspection. Preventing Cracked Heads with Heavy-Duty Truck Service Preventative maintenance is the only way to avoid the big repairs. A cracked head or a warped block is almost always the result of ignored cooling symptoms. When you bring your vehicle to a professional commercial truck shop, the technicians look for the subtle signs that a driver might miss. Professional maintenance includes: Pressure Testing: Checking the system for leaks that only appear under operating pressure. Coolant Analysis: Testing the chemical balance of the coolant to ensure it still protects against cavitation and corrosion. Belt and Hose Inspection: Replacing worn serpentine belts that drive the water pump before they snap. By staying ahead of these issues, you protect the core of your truck and ensure your uptime remains high. Identifying Water Pump Failure The water pump is the heart of the system. It circulates the coolant through the block and heads. If the pump's internal impellers erode or the bearing fails, the circulation stops. Watch for "weep hole" leaks. Most heavy-duty water pumps have a small hole designed to leak slightly when the internal seal begins to fail. If you see coolant dripping from the front of the engine near the pulley, your water pump is on its way out. Replacing a pump is a standard semi-truck repair that can save you from a total engine meltdown on the side of the interstate. Summary of Cooling System Health Keeping a heavy-duty engine cool is a balance of airflow, fluid movement, and mechanical timing. Airflow: Controlled by the clutch fan and the cleanliness of the radiator. Fluid Movement: Controlled by the water pump and thermostat. Integrity: Maintained by high-quality hoses, clamps, and seals. If any one of these three pillars fails, the engine is at risk. Monitoring your gauges and performing visual inspections are your first lines of defense. Contact Mainline RV & Truck Service for Semi-Truck Repair If your temperature gauge is climbing higher than usual or you’ve noticed a drop in cooling performance, don’t wait for a breakdown. The experts at Mainline RV & Truck Service specialize in comprehensive heavy-duty truck service to keep your fleet moving. Whether you need a radiator flush, a new fan clutch, or a complex engine diagnostic, our commercial truck shop has the tools and expertise to get the job done right. We understand that in the trucking industry, time is money. We focus on fast, accurate semi-truck repair to minimize your downtime and prevent costly engine damage. Contact us to schedule your service or learn more about our maintenance programs.
April 27, 2026
Stop the "white-knuckle" driving! Learn what causes motorhome porpoising and how professional RV suspension upgrades can restore safety and comfort to your ride.
April 21, 2026
Don't let your RV generator die from disuse! Learn why "exercising" your Onan generator prevents costly repairs and keeps your motorhome ready for the road.
April 13, 2026
Safe stopping is as vital as engine power when towing a heavy load. Many truck owners overlook trailer brakes until an issue arises. At Mainline RV & Truck Service , we handle various towing setups, primarily electric and surge brakes. Both systems stop a trailer safely, but they operate differently and require separate trailer maintenance approaches. Understanding these differences is essential for road safety. We offer an expert comparison, including specific maintenance needs. Understanding the Fundamental Differences Before discussing what keeps them running smoothly, we should look at how the two systems operate. Electric brakes get their power from an electrical signal sent from the tow vehicle. Pressing the truck’s brake pedal tells the brake controller to send electricity to powerful electromagnets inside the trailer’s drum brakes. These magnets engage an armature plate, which then forces the brake shoes out against the inside of the drum. Surge brakes use hydraulics and work on their own, independent of the truck’s electrical system. Their operation is based on inertia. When the truck begins to slow down, the trailer pushes forward into the hitch. That physical pressure compresses a master cylinder built into the trailer coupler, which then pumps hydraulic fluid to the brake cylinders or calipers. Because one system is powered by electricity and the other by fluid pressure, their weak points and overall maintenance needs are very different. Electric Brakes: Fine-Tuning and Electrical Integrity Electric brakes are standard equipment for nearly all travel trailers and large, heavy-duty flatbed trailers. Since they depend on a good connection between the truck and the trailer, maintenance starts right at the hitch and extends all the way to the brake shoes. Adjusting the "Gain" on Your Brake Controller A key part of operating electric brakes is a setting that you control from inside the truck’s cab, not on the trailer itself. The “Gain” value on your brake controller sets the amount of electrical power sent to the trailer brakes. If the gain is set too low, the truck does all the braking work, which leads to your truck’s rotors getting too hot and your stopping distance increasing. Setting the gain too high means the trailer brakes will lock up easily. Routine truck trailer repair and safety checks involve resetting the gain any time the weight of your load changes significantly. A carefully adjusted gain ensures the truck and trailer brake together, preventing unnecessary stress on either vehicle. Troubleshooting "Grabby" or Locking Brakes A common complaint is that the trailer brakes feel “grabby,” meaning they engage too suddenly or violently with only a little pedal pressure. Often, something is causing a maintenance issue. Common reasons include: Corrosion on the electromagnets: If the trailer has been sitting unused, rust can form and cause the magnets to stick when engaged. Incorrect Gain settings: As mentioned earlier, improper calibration is a frequent culprit. Grease on the shoes: A failed wheel seal can let grease leak onto the brake components, leading to unpredictable braking action. During a professional trailer repair inspection, mechanics remove the drums to check that the magnets are wearing evenly and confirm that no oil or debris is contaminating the friction surfaces. Surge Brakes: Hydraulic Health and Fluid Management Surge brakes are most frequently seen on boat trailers (where electrical parts and water do not mix well) and on rental trailers (because the tow vehicle does not need a specialized controller). Checking Fluid Levels for Surge Couplers Surge brakes primarily fail due to low hydraulic fluid. As the master cylinder in the trailer's tongue or coupler is exposed to constant movement, seals wear, and moisture can enter the system. Routine maintenance requires checking the master cylinder reservoir fluid level; dark or cloudy fluid indicates moisture contamination, necessitating a full flush and replacement. Without sufficient, clean fluid, the surge coupler cannot generate the force required to activate the brakes, leaving the trailer brakeless. Inspecting the Moving Parts of the Coupler Since surge brakes work by the physical “sliding” movement of the coupler mechanism, that sliding part must be kept lubricated and clean. If the coupler rusts or jams up, the brakes might stay applied even when you are driving, or they may completely fail to engage when you slow down. The Common Ground: Shoe Adjustment and Wear The way the brake shoes are moved might be different, electricity for one, hydraulics for the other, but the shoes themselves need manual upkeep in both systems. Shoe Adjustment Intervals for Heavy-Duty Trailer Repair While some newer trailers feature self-adjusting brakes, many heavy-duty models still need manual adjustment. As the friction material on the brake shoes wears away, the space between the shoe and the drum increases. The result is a noticeable delay in braking response. For dependable safety, we advise having your brake shoes inspected and adjusted every 3,000 to 5,000 miles. During a trailer maintenance appointment, a technician uses a “star wheel” adjuster to move the shoes closer to the drum. This ensures that the trailer brakes immediately when you press the pedal. Which System is More Maintenance-Intensive? Surge brakes demand hands-on maintenance (checking fluid/grease). Electric brakes risk less obvious electrical failures (wiring, fuses, ground). For heavy loads, electric brakes offer a manual override for sway correction, but require electrical knowledge for troubleshooting. Surge brakes are simpler for the driver but need constant hydraulic system vigilance to prevent failure. Summary Checklist for Trailer Safety Keep your trailer operating at its best by following these simple guidelines: Annual Inspections: Have a certified professional examine your brakes and wheel bearings at least once a year, regardless of how many miles you have driven. Test Before You Tow: Always perform a quick “tug test” to confirm the brakes are working before you get out on the road. Watch for Corrosion: Check the 7-way electrical plug (for electric brakes) or your brake fluid lines (for surge brakes) for any signs of rust or damage. Listen: Squeaking, grinding, or clicking sounds are the most immediate indicators that truck trailer repair is necessary. Contact Mainline RV & Truck Service for Trailer Repair & More! Taking care of your trailer brakes is about more than just protecting your equipment; it directly impacts the safety of everyone sharing the road. If you are struggling with a malfunctioning brake controller, a leaking surge master cylinder, or you simply need a routine adjustment of your brake shoes, the experts at Mainline RV & Truck Service are ready to assist. We specialize in comprehensive trailer maintenance, truck trailer repair, and heavy-duty trailer repair services. Don't leave your stopping power to chance. Contact us online today .
By Mainline Truck Team March 10, 2026
Learn how to identify alignment vs. suspension-related irregular tire wear and enhance safety and performance. Call Mainline RV & Truck Service today.
By Mainline Truck Team March 2, 2026
Learn the importance of air brake winterization in Ohio, along with proven strategies to keep your system functioning. Contact Mainline RV & Truck Service.