Why the 3,000-Mile Truck Oil-Change Rule Is a Myth

Mainline Truck Team • January 5, 2026

The idea that you must change your vehicle’s oil every 3,000 miles is deeply ingrained in automotive culture. For decades, many fleet managers and owner-operators followed the “3k rule” as a safe default for a truck oil change. However, today’s vehicles, lubricants, and maintenance technologies have advanced, making that rigid interval outdated.

Simply put, you don’t always need to change your oil at 3,000 miles.


In this guide, we explore how the 3,000-mile interval arose, how engine and oil technology have shifted, and how modern guidelines and monitoring systems can determine intervals more precisely.


Origins of the 3,000-Mile Interval and the Emergence of Synthetic Oils


The 3,000-mile oil-change rule took hold in the 1960s and 1970s, when most vehicles relied on conventional mineral-based oils. These early lubricants broke down quickly under heat, oxidation, and contamination. Engines of the time were less precise in their machining and used materials that generated more wear particles. Combined with shorter trips and less effective filtration, oil simply didn’t last as long as it does today.


Service shops began promoting the 3,000-mile interval as a safe, easy-to-remember standard. It became a mantra of preventive maintenance: better to change too soon than risk engine damage. For many years, that advice made sense. Oil chemistry was limited, and the cost of frequent truck oil changes was small compared to the potential cost of engine failure.


Then, synthetic oils entered the picture. Developed with advanced refining and chemical processes, these lubricants offered higher resistance to heat, oxidation, and sludge 

formation. They maintained their viscosity longer, flowed more easily in cold conditions, and reduced internal engine friction.


As synthetic oils became more common, the old 3,000-mile benchmark started to lose its relevance. These new formulations could easily go 7,500 or even 10,000 miles before degrading, especially in engines built to take advantage of their properties.


How Engine and Oil Technology Changed Maintenance Cycles


Modern engines and oils have transformed what a proper oil change interval looks like, especially for commercial trucks. Consider the following improvements:


  • Engine designs now routinely use lighter alloys, variable geometry turbochargers, direct fuel injection, and advanced emissions equipment. These changes place different demands on oil but are also more robust.
  • Oil formulations are now much more advanced: improved synthetic blends, full synthetic oils, enhanced additive packages, and better detergency. These support longer service intervals.
  • Filtration systems have improved to include deeper capacity, finer media, and often more effective bypass filtration in heavy-duty applications.
  • Engine monitoring and diagnostics are now more sophisticated. Sensors monitoring crankcase pressure, oil condition, and temperature/humidity, as well as onboard telematics systems, can detect when a truck oil change is truly needed rather than relying on an arbitrary interval.


These changes mean that a one-size-fits-all interval such as “every 3,000 miles” is no longer necessary, or optimal, for many modern trucks. Instead, the interval should reflect vehicle design, duty cycle, oil quality, and operating conditions.


Using OEM Guidelines and Oil Monitoring Systems


To determine a proper truck oil change interval, two major pillars stand out:


1. OEM (original equipment manufacturer) guidelines.

Manufacturers publish service intervals in the owner’s manual or service materials. These intervals are determined based on engine design, oil type, operating environment, and warranty considerations. For heavy-duty trucks, the OEM might recommend intervals of tens of thousands of miles or more under normal service. Following the OEM guideline is a far better baseline than reverting to the generic 3,000-mile rule.

2. Oil condition monitoring systems.

Many fleets and modern vehicles now include sensors and telematics to track oil quality, contamination, degradation, and usage. These systems can:


  • Measure oil oxidation or nitration levels.
  • Monitor soot or particulate loading in the oil.
  • Track actual operating hours, engine starts, idle time, load cycles, and ambient conditions, all of which affect oil condition.
  • Alert when oil parameters exceed safe thresholds, prompting a change.


Using these tools allows truck operators to shift from time- or distance-based intervals to condition-based schedules. A truck might run far more than 3,000 miles between oil changes, or it might require an earlier change if it’s doing heavy stop-start loads, extreme temperatures, or high idling hours.


Beyond Onboard Sensors: The Value of Oil Analysis


For the most precise condition-based maintenance, many fleets and owner-operators rely on regular oil analysis. This process involves taking a small sample of used oil and sending it to a laboratory. The resulting report is a detailed health check for the oil and the engine. It reveals the oil’s remaining viscosity, additive levels, and any contaminants such as soot, fuel, or coolant. Critically, it also measures the presence of specific wear metals, like iron, copper, 

or lead.


This information not only pinpoints the exact moment the oil needs changing but also serves as an early warning system for internal engine problems, like a failing bearing or a coolant leak, long before a catastrophic failure.


Why Dumping Oil Prematurely Is a Cost and Environmental Drain


Changing oil too early is more than unnecessary maintenance; it has real cost and sustainability implications.


Cost implications:


  • Frequent truck oil changes increase parts and labor costs.
  • Premature disposal of serviceable oil reduces return on investment for that fluid.
  • For fleets, unnecessary downtime for oil service reduces productivity and raises the total cost of ownership.


Environmental impacts:


  • Used oil must be collected, processed, or disposed of safely. More frequent changes increase the volume of used oil waste.
  • New oil manufacturing, packaging, and shipping also carry environmental costs (energy, raw materials, logistics).
  • By optimizing oil change intervals, you reduce waste and environmental footprint, while still preserving engine integrity.


In short, if the oil is still performing and protecting the engine, changing it simply because 3,000 miles passed might be wasteful. That doesn’t mean skipping truck oil changes entirely; it means basing them on condition rather than tradition.


How to Determine Modern Truck Oil-Change Intervals


Here are actionable practices to determine and manage oil-change intervals for modern trucks:


1. Start with the OEM interval.

Refer to the truck manufacturer’s service manual. Note whether the interval applies under normal or severe service conditions. Many heavy-duty trucks have service intervals of 15,000 to 25,000 miles or more for oil changes under recommended oil and filter types.


2. Understand your duty cycle.

Heavy idling, short trips, frequent stops, extreme loads, high ambient temperatures, and unclean environments all shorten oil lifespan. If your vehicle operates under severe duty conditions, consider shortening the interval or rely more heavily on condition-based monitoring.


3. Use condition-monitoring tools.

Install oil sensors or use telematics to measure oil degradation, soot loading, and operating parameters. If sensors indicate oil health is declining, change early; if oil remains healthy beyond the standard interval, you may safely extend it.


4. Choose the right oil and filter.

Use high-quality synthetic or synthetic-blend oils specified by the manufacturer, as well as filters with proven efficiency and capacity. The combination will help extend oil life and protect the engine over longer intervals.


5. Track engine hours along with mileage.

Mileage matters, but engine hours and idle time often matter more in commercial truck use. A truck that does many idle hours may degrade oil faster than one that racks up miles at highway speed.


6. Maintain clean engine air and crankcase systems.

Keeping air intake systems clean, ensuring crankcase ventilation is functioning, and maintaining cooling systems helps the oil last longer and stay cleaner.


7. Track and analyze the performance.

Keep records of oil condition, hours/mileage at oil change, and any abnormal operating conditions. Over time, you’ll build a data-driven profile of what interval works well for your fleet or individual truck.

By moving away from the blanket 3,000-mile interval and toward a data-driven, condition-based schedule, you will maximize engine protection, reduce unnecessary maintenance, and optimize total cost of ownership.


Real-World Considerations for Fleet Managers and Owner-Operators


Here are specific tips for those scheduling truck oil changes:


  • Segment your trucks by duty cycle. Highway-only trucks may stretch intervals further than regional trucks with stop-start service.
  • Use telematics to track actual idle hours and load conditions, then compare with oil lab data or sensor readings.
  • Budget maintenance based on condition rather than calendar-based service work.
  • Communicate to drivers: let them know why longer intervals are possible when oil remains good, but emphasize that monitoring is the key; not simply “I’ll wait until 10,000 miles because someone told me that’s okay.”


If you adopt this approach, you will protect your engine health, streamline maintenance planning, and reduce idle time and costs.


Contact Mainline RV & Truck Service for Your Truck Oil Change


If you’re looking for a reliable partner for your next truck oil change, turn to
Mainline RV & Truck Service in Cleveland, Ohio. We have the experience and diagnostic capabilities to determine the right service interval for your individual truck or fleet. Call 440-439-7777 or fill out our online contact form to schedule your oil change today.


Contact Us
June 30, 2026
For owner-operators and fleet managers in Cleveland, a commercial truck is more than just a vehicle. It is a livelihood. When your transmission begins to fail, it doesn't just threaten your schedule; it threatens your safety and your bottom line. Ignoring the early warning signs of gear grinding or clutch slippage usually leads to a total breakdown on the side of I-90 or I-71. Understanding how to recognize commercial clutch and transmission failure early can save you thousands of dollars in avoidable downtime. At Mainline RV & Truck Service , we specialize in high-stakes commercial truck repairs . We see firsthand how minor adjustments can prevent catastrophic failures if caught in time. The Mechanics of the Modern Commercial Transmission Commercial transmissions are engineered to handle massive torque and heavy payloads. Unlike passenger vehicles, these systems undergo extreme thermal stress and constant shifting. The synergy between the clutch, the pressure plate, and the internal gear sets must be perfect to maintain fuel efficiency and power delivery. When you hear a grind, you are hearing metal-on-metal contact that shouldn't be happening. This is often the final cry for help from a system that has been struggling for miles. Slipping Clutches: High RPMs and No Power One of the most common precursors to a full transmission failure is a slipping clutch. This is often more noticeable when the truck is under a heavy load or climbing a grade. What to look for: RPM Surges: You press the accelerator, and the tachometer climbs rapidly, but your road speed stays the same. Burning Smell: A slipping clutch generates intense heat. If you smell a pungent, burnt odor coming from the bell housing, the friction material is likely disintegrating. Lack of Bite: The clutch pedal may feel "soft" or engage much higher in its travel than it used to. If your engine is revving without providing the necessary torque to the wheels, your clutch is no longer effectively transferring power. Continuing to drive with a slipping clutch will eventually warp the flywheel, turning a standard clutch swap into a much more expensive truck repair. Hard Shifting: Is it Fluid or Hardware? If you find yourself "fighting" the gear stick or hearing a loud crunch every time you shift, you are experiencing hard shifting. This is a primary indicator of internal transmission distress. In our Cleveland semi-truck repair shop, we generally categorize hard shifting into two causes: fluid issues or synchronizer wear. 1. Low or Contaminated Fluid Transmission fluid serves three purposes: lubrication, cooling, and hydraulic pressure. If the fluid level is low, the internal components generate excessive friction. If the fluid is old, it loses its viscosity and ability to protect the gears. 2. Synchronizer Wear Synchronizers are responsible for matching the speed of the gear you are shifting into. When these wear down, the gears clash because they are spinning at different speeds. This results in the classic grinding gears sound. Linkage Adjustments: The Affordable Solution Not every grinding gear requires a full transmission rebuild. Sometimes, the problem exists outside of the gearbox itself. The linkage is the series of rods and cables that connect your shift lever to the transmission. Over time, these components can stretch, bend, or vibrate out of alignment. If the linkage is off by even a fraction of an inch, the transmission won't fully engage the gear. This causes the gear to pop out or grind during the shift. Why linkage checks matter: Cost-Effective: A linkage adjustment is a fraction of the cost of a transmission overhaul. Prevention: Proper alignment prevents "dog teeth" wear on the internal gears. Driver Comfort: Correct linkage makes for smoother shifting and less physical fatigue for the driver. Before you assume your transmission is shot, have a professional technician check the linkage and clutch brake adjustments. The Importance of Professional Transmission Diagnostics Modern commercial trucks are equipped with complex Electronic Control Units (ECUs). Many transmission issues are now triggered by sensor failures or solenoid malfunctions rather than mechanical gear breakage. A professional diagnostic involves more than just a test drive. It includes: Computerized Scanning: Retrieving fault codes that indicate specific solenoid or sensor failures. Fluid Analysis: Checking for metal shavings in the transmission pan, which indicates internal component disintegration. Pressure Testing: Ensuring the hydraulic system is maintaining the correct pressure to engage clutches and gears. Securing a diagnostic for commercial truck repairs early on is the best way to ensure your fleet stays on the road. Maintaining Your Drivetrain in Cleveland’s Climate Cleveland's weather puts unique stress on commercial transmissions. The constant shifting required in stop-and-go traffic on slushy or icy roads can lead to overheating. Additionally, road salt can corrode external linkages and slave cylinders. Regular inspections are the only way to combat the environmental wear-and-tear unique to the Great Lakes region. Whether you are hauling regional freight or operating a local delivery fleet, your transmission maintenance schedule should be a top priority. Contact Mainline RV & Truck Service for Commercial Truck Repairs If you are experiencing gear grinding, hard shifting, or clutch slippage, do not wait for a total failure. At Mainline RV & Truck Service, we provide expert truck repair services designed to get you back on the road quickly and safely. Our team understands the nuances of heavy-duty transmissions. We prioritize honest diagnostics, helping you determine if you need a simple linkage adjustment or a more comprehensive repair. We are the trusted name for Cleveland semi-truck repair, offering the technical expertise required for today’s complex commercial vehicles. Our Commercial Services Include: Clutch replacements and adjustments Transmission fluid flushes and filter changes Driveline and U-joint repairs Comprehensive electronic diagnostics Flywheel resurfacing Don't let a small grind turn into a major expense. Keep your truck moving and your business profitable. Contact us today to schedule your transmission diagnostic and commercial truck repairs.
June 30, 2026
When you are hauling heavy loads across long distances, your engine generates an immense amount of heat. The cooling system is the only thing standing between a productive day on the road and a catastrophic engine failure. At Mainline RV & Truck Service , we see how quickly a small cooling issue can escalate into a massive repair bill. Understanding how to troubleshoot your heavy-duty cooling system is essential for every fleet owner and operator. Efficient heat management ensures your engine runs within the optimal temperature range, preserving fuel economy and engine longevity. The High Stakes of Engine Temperature Management Heavy-duty engines are designed to operate under high pressure. However, they have a very low tolerance for overheating. When the cooling system fails, the internal temperatures of the engine block skyrocket. This leads to metal expansion beyond design limits. The most common result of chronic overheating is a cracked cylinder head. Replacing a head is a labor-intensive and expensive process that involves significant downtime. Regular heavy-duty truck service focuses on identifying weak points in the cooling circuit before they lead to these structural failures. Troubleshooting Thermostat Failures The thermostat is a small component that plays a massive role. It acts as a gatekeeper, regulating the flow of coolant between the engine and the radiator. When it fails, it usually does so in one of two ways: Stuck in the Closed Position: This is a critical failure. The coolant cannot reach the radiator to shed heat. Your temperature gauge will climb rapidly, often leading to an immediate overheat situation. Stuck in the Open Position: While less explosive, this causes the engine to run too cold. This prevents the engine from reaching its efficient operating temperature, leading to poor fuel mileage and increased soot buildup in the DPF system. If you notice erratic temperature fluctuations, it is time to have a commercial truck shop test your thermostat. Understanding Clutch Fan Issues Your truck’s cooling fan consumes a significant amount of horsepower. To save fuel, the clutch fan only engages when the engine reaches a specific temperature threshold. If your fan fails to engage, you will likely notice the truck stays cool while moving at highway speeds but begins to overheat when climbing grades or idling. Common signs of clutch fan failure include: The fan spinning freely with no resistance when the engine is off. The fan failing to "roar" or engage when the engine exceeds 200–210 degrees. Oil or fluid leaking from the fan clutch hub. A malfunctioning fan clutch puts unnecessary stress on the rest of the cooling system. If the air isn't being pulled through the radiator, the coolant cannot do its job. Why You Must Clean the Radiator Stack Heavy-duty trucks spend thousands of hours on highways and in industrial sites. Over time, the "stack," which includes the radiator, the charge air cooler (CAC), and the AC condenser, collects an incredible amount of debris. Dust, bugs, road salt, and plastic debris get sucked into the fins. This creates a physical barrier that prevents airflow. Even if your water pump and thermostat are working perfectly, a clogged radiator stack will cause the engine to run hot because there is no heat exchange happening. Cleaning Tips for Drivers: Visually inspect the front of the grill daily. Use low-pressure compressed air or water to blow out debris from the back toward the front. Avoid using high-pressure washers directly on the delicate fins, as this can bend them and permanently restrict airflow. The Role of Coolant Quality and Level It isn't just about the parts; it is about the fluid. Modern heavy-duty engines require specific Extended Life Coolants (ELC). Using the wrong coolant or mixing incompatible types can lead to "gelation," where the fluid turns into a thick sludge that plugs the radiator tubes. Furthermore, low coolant levels often point to a leak in the EGR cooler or a vibrating hose that has rubbed through. Small leaks might not leave a puddle on the ground because the fluid evaporates on the hot engine block. Keep a close eye on your reservoir levels during every pre-trip inspection. Preventing Cracked Heads with Heavy-Duty Truck Service Preventative maintenance is the only way to avoid the big repairs. A cracked head or a warped block is almost always the result of ignored cooling symptoms. When you bring your vehicle to a professional commercial truck shop, the technicians look for the subtle signs that a driver might miss. Professional maintenance includes: Pressure Testing: Checking the system for leaks that only appear under operating pressure. Coolant Analysis: Testing the chemical balance of the coolant to ensure it still protects against cavitation and corrosion. Belt and Hose Inspection: Replacing worn serpentine belts that drive the water pump before they snap. By staying ahead of these issues, you protect the core of your truck and ensure your uptime remains high. Identifying Water Pump Failure The water pump is the heart of the system. It circulates the coolant through the block and heads. If the pump's internal impellers erode or the bearing fails, the circulation stops. Watch for "weep hole" leaks. Most heavy-duty water pumps have a small hole designed to leak slightly when the internal seal begins to fail. If you see coolant dripping from the front of the engine near the pulley, your water pump is on its way out. Replacing a pump is a standard semi-truck repair that can save you from a total engine meltdown on the side of the interstate. Summary of Cooling System Health Keeping a heavy-duty engine cool is a balance of airflow, fluid movement, and mechanical timing. Airflow: Controlled by the clutch fan and the cleanliness of the radiator. Fluid Movement: Controlled by the water pump and thermostat. Integrity: Maintained by high-quality hoses, clamps, and seals. If any one of these three pillars fails, the engine is at risk. Monitoring your gauges and performing visual inspections are your first lines of defense. Contact Mainline RV & Truck Service for Semi-Truck Repair If your temperature gauge is climbing higher than usual or you’ve noticed a drop in cooling performance, don’t wait for a breakdown. The experts at Mainline RV & Truck Service specialize in comprehensive heavy-duty truck service to keep your fleet moving. Whether you need a radiator flush, a new fan clutch, or a complex engine diagnostic, our commercial truck shop has the tools and expertise to get the job done right. We understand that in the trucking industry, time is money. We focus on fast, accurate semi-truck repair to minimize your downtime and prevent costly engine damage. Contact us to schedule your service or learn more about our maintenance programs.
April 27, 2026
Stop the "white-knuckle" driving! Learn what causes motorhome porpoising and how professional RV suspension upgrades can restore safety and comfort to your ride.
April 21, 2026
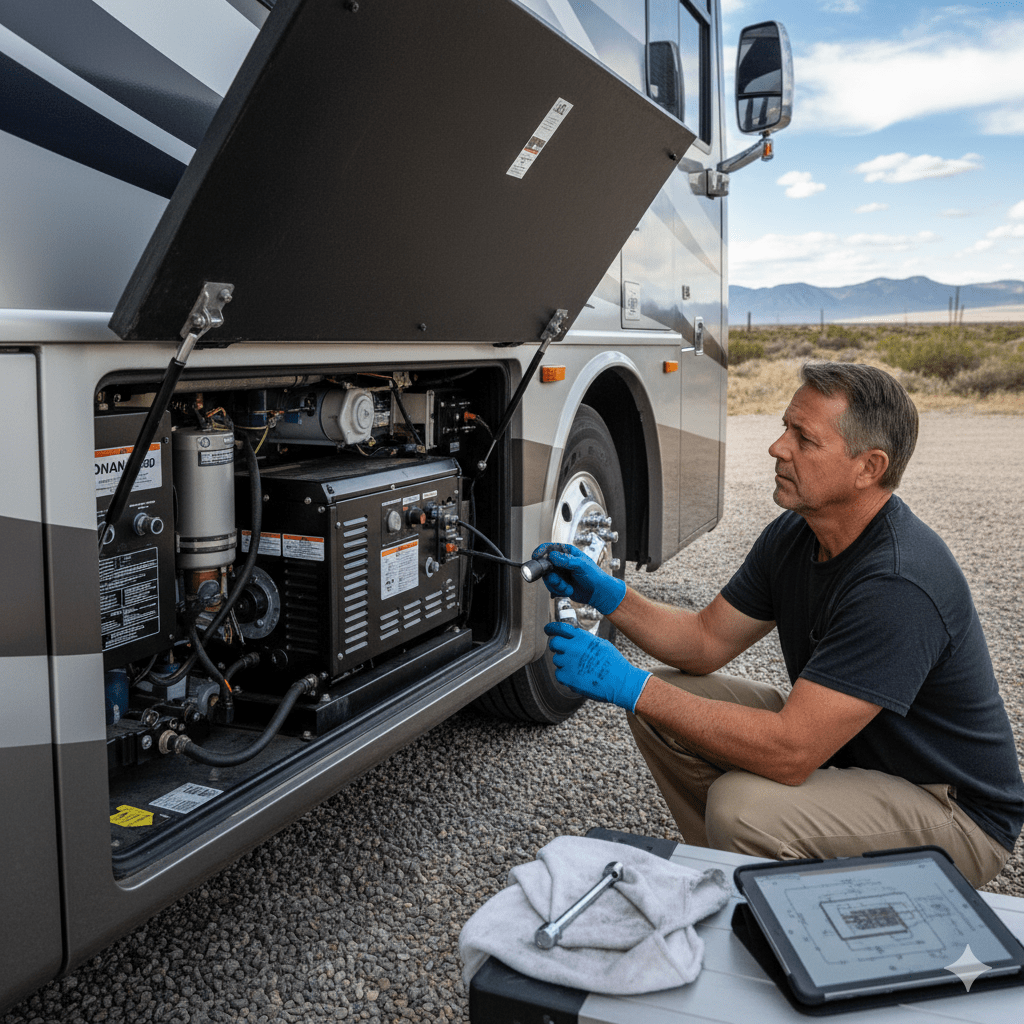
Don't let your RV generator die from disuse! Learn why "exercising" your Onan generator prevents costly repairs and keeps your motorhome ready for the road.
April 13, 2026
Safe stopping is as vital as engine power when towing a heavy load. Many truck owners overlook trailer brakes until an issue arises. At Mainline RV & Truck Service , we handle various towing setups, primarily electric and surge brakes. Both systems stop a trailer safely, but they operate differently and require separate trailer maintenance approaches. Understanding these differences is essential for road safety. We offer an expert comparison, including specific maintenance needs. Understanding the Fundamental Differences Before discussing what keeps them running smoothly, we should look at how the two systems operate. Electric brakes get their power from an electrical signal sent from the tow vehicle. Pressing the truck’s brake pedal tells the brake controller to send electricity to powerful electromagnets inside the trailer’s drum brakes. These magnets engage an armature plate, which then forces the brake shoes out against the inside of the drum. Surge brakes use hydraulics and work on their own, independent of the truck’s electrical system. Their operation is based on inertia. When the truck begins to slow down, the trailer pushes forward into the hitch. That physical pressure compresses a master cylinder built into the trailer coupler, which then pumps hydraulic fluid to the brake cylinders or calipers. Because one system is powered by electricity and the other by fluid pressure, their weak points and overall maintenance needs are very different. Electric Brakes: Fine-Tuning and Electrical Integrity Electric brakes are standard equipment for nearly all travel trailers and large, heavy-duty flatbed trailers. Since they depend on a good connection between the truck and the trailer, maintenance starts right at the hitch and extends all the way to the brake shoes. Adjusting the "Gain" on Your Brake Controller A key part of operating electric brakes is a setting that you control from inside the truck’s cab, not on the trailer itself. The “Gain” value on your brake controller sets the amount of electrical power sent to the trailer brakes. If the gain is set too low, the truck does all the braking work, which leads to your truck’s rotors getting too hot and your stopping distance increasing. Setting the gain too high means the trailer brakes will lock up easily. Routine truck trailer repair and safety checks involve resetting the gain any time the weight of your load changes significantly. A carefully adjusted gain ensures the truck and trailer brake together, preventing unnecessary stress on either vehicle. Troubleshooting "Grabby" or Locking Brakes A common complaint is that the trailer brakes feel “grabby,” meaning they engage too suddenly or violently with only a little pedal pressure. Often, something is causing a maintenance issue. Common reasons include: Corrosion on the electromagnets: If the trailer has been sitting unused, rust can form and cause the magnets to stick when engaged. Incorrect Gain settings: As mentioned earlier, improper calibration is a frequent culprit. Grease on the shoes: A failed wheel seal can let grease leak onto the brake components, leading to unpredictable braking action. During a professional trailer repair inspection, mechanics remove the drums to check that the magnets are wearing evenly and confirm that no oil or debris is contaminating the friction surfaces. Surge Brakes: Hydraulic Health and Fluid Management Surge brakes are most frequently seen on boat trailers (where electrical parts and water do not mix well) and on rental trailers (because the tow vehicle does not need a specialized controller). Checking Fluid Levels for Surge Couplers Surge brakes primarily fail due to low hydraulic fluid. As the master cylinder in the trailer's tongue or coupler is exposed to constant movement, seals wear, and moisture can enter the system. Routine maintenance requires checking the master cylinder reservoir fluid level; dark or cloudy fluid indicates moisture contamination, necessitating a full flush and replacement. Without sufficient, clean fluid, the surge coupler cannot generate the force required to activate the brakes, leaving the trailer brakeless. Inspecting the Moving Parts of the Coupler Since surge brakes work by the physical “sliding” movement of the coupler mechanism, that sliding part must be kept lubricated and clean. If the coupler rusts or jams up, the brakes might stay applied even when you are driving, or they may completely fail to engage when you slow down. The Common Ground: Shoe Adjustment and Wear The way the brake shoes are moved might be different, electricity for one, hydraulics for the other, but the shoes themselves need manual upkeep in both systems. Shoe Adjustment Intervals for Heavy-Duty Trailer Repair While some newer trailers feature self-adjusting brakes, many heavy-duty models still need manual adjustment. As the friction material on the brake shoes wears away, the space between the shoe and the drum increases. The result is a noticeable delay in braking response. For dependable safety, we advise having your brake shoes inspected and adjusted every 3,000 to 5,000 miles. During a trailer maintenance appointment, a technician uses a “star wheel” adjuster to move the shoes closer to the drum. This ensures that the trailer brakes immediately when you press the pedal. Which System is More Maintenance-Intensive? Surge brakes demand hands-on maintenance (checking fluid/grease). Electric brakes risk less obvious electrical failures (wiring, fuses, ground). For heavy loads, electric brakes offer a manual override for sway correction, but require electrical knowledge for troubleshooting. Surge brakes are simpler for the driver but need constant hydraulic system vigilance to prevent failure. Summary Checklist for Trailer Safety Keep your trailer operating at its best by following these simple guidelines: Annual Inspections: Have a certified professional examine your brakes and wheel bearings at least once a year, regardless of how many miles you have driven. Test Before You Tow: Always perform a quick “tug test” to confirm the brakes are working before you get out on the road. Watch for Corrosion: Check the 7-way electrical plug (for electric brakes) or your brake fluid lines (for surge brakes) for any signs of rust or damage. Listen: Squeaking, grinding, or clicking sounds are the most immediate indicators that truck trailer repair is necessary. Contact Mainline RV & Truck Service for Trailer Repair & More! Taking care of your trailer brakes is about more than just protecting your equipment; it directly impacts the safety of everyone sharing the road. If you are struggling with a malfunctioning brake controller, a leaking surge master cylinder, or you simply need a routine adjustment of your brake shoes, the experts at Mainline RV & Truck Service are ready to assist. We specialize in comprehensive trailer maintenance, truck trailer repair, and heavy-duty trailer repair services. Don't leave your stopping power to chance. Contact us online today .
By Mainline Truck Team March 10, 2026
Learn how to identify alignment vs. suspension-related irregular tire wear and enhance safety and performance. Call Mainline RV & Truck Service today.
By Mainline Truck Team March 2, 2026
Learn the importance of air brake winterization in Ohio, along with proven strategies to keep your system functioning. Contact Mainline RV & Truck Service.
By Mainline Truck Team March 2, 2026
Learn what black, white, and blue smoke from a diesel exhaust mean and when you need to seek semi-truck repairs. Contact Mainline RV & Truck Service.
By Mainline Truck Team December 24, 2025
Learn what to expect from a commercial truck shop, from quick fixes and full services to fleet-focused value. Contact Mainline RV & Truck Service today.
By Mainline Truck Team December 24, 2025
Learn the essentials of heavy-duty truck service that improve performance, reduce downtime, and extend lifespan. Contact Mainline RV & Truck Service today.