The Complete Onan Generator Repair and Maintenance Guide

WSI ALM • February 8, 2024

The Complete Onan Generator Repair and Maintenance Guide

Truck repair tools

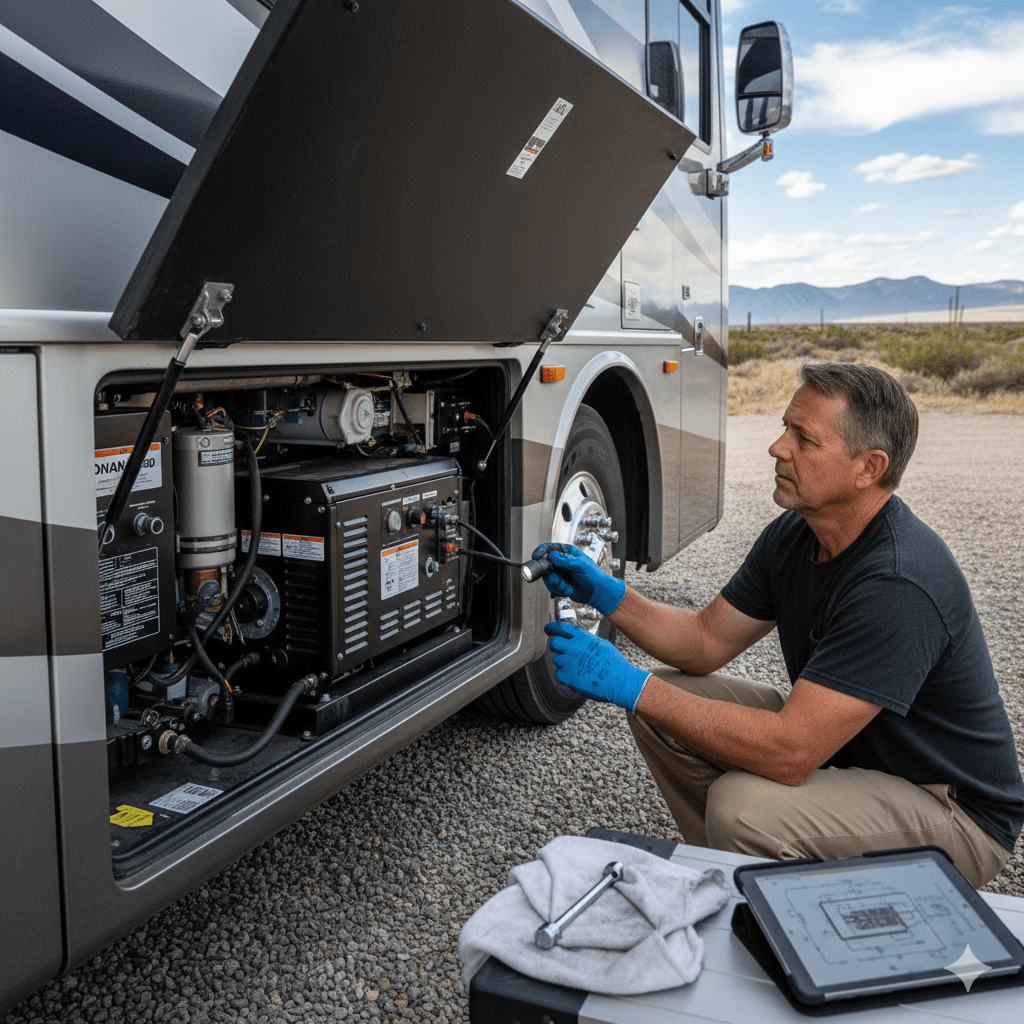
Having a generator on your RV allows you to power appliances and electronics when you don't have access to shore power. Regular maintenance is crucial to keeping your Onan RV generator running smoothly and preventing potential problems down the road. Here are the most important tips on general maintenance tasks to perform for Onan generator repair.


How to Keep Your Onan Generator Running Smoothly


Follow these tips to keep your Onan RV generator in top working condition:


●    Check the oil level regularly and top it off as needed. Low oil can cause serious engine damage.

●    Change the oil and filter at the recommended intervals. This prevents the buildup of sludge.

●    Inspect and replace the air filter as needed. A dirty filter can restrict airflow.

●    Check for leaks and fix any that are found. Leaks can lead to overheating problems.

●    Make sure the generator is properly ventilated when running.

●    Listen for any odd noises or vibrations that may indicate an issue.

●    Clean the exterior to prevent dirt buildup that could clog components.

●    Always have a certified RV technician perform more complex maintenance and repairs.


General Onan Generator Maintenance


The key maintenancetasks for an Onan RV generator include:


●    Change oil and filter: This should be done every 100-150 hours of running time, at minimum annually. Use oil viscosity based on the outside air temperature.

●    Inspect/replace air filter: Check filters every 50 hours and replace as needed. Clogged filters reduce performance.

●    Check belt tension: The drive belt should have proper tension to work correctly. Adjust per manufacturer specifications.

●    Inspect fuel lines/replace fuel filter: Look for cracking or loose connections and replace fuel filters annually.

●    Clean spark arrestor: Prevent buildup of soot that can affect performance and ventilation.

●    Inspect starting battery: Check terminals are clean/tight. The battery must be properly charged to start the generator.


Changing the Oil for Your Onan RV Generator


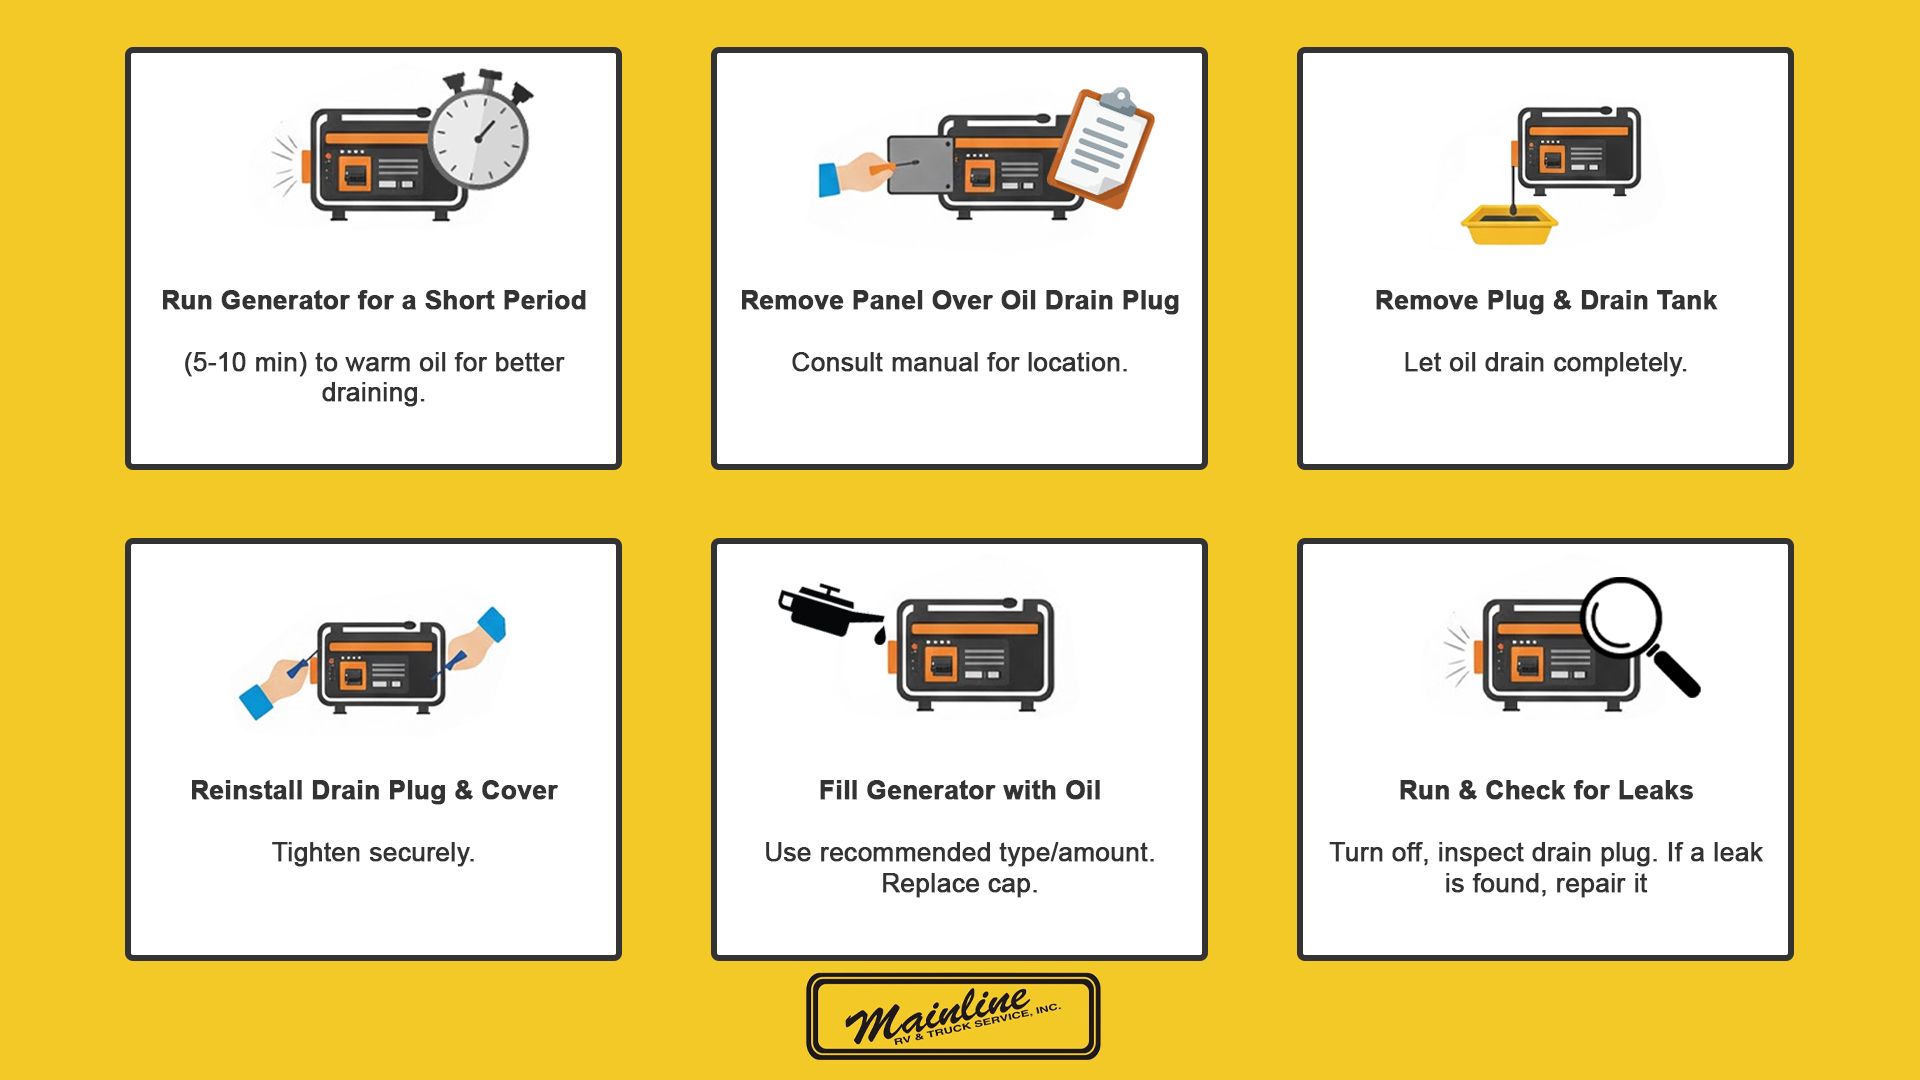
Here are the steps to safely change the oil on your Onan generator:


Run the Generator for a Short Period


Run the generator for 5-10 minutes before changing the oil. This warms the oil so it drains better.


Remove the Panel Over the Oil Drain Plug


Refer to your owner's manual for the drain plug location. Remove the access panel or cover to access the oil drain plug.


Remove the Plug and Drain the Tank


Place an oil pan under the drain plug. Use a wrench to remove the plug and allow the oil to fully drain out.


Reinstall Drain Plug


Once drained, replace the drain plug and tighten securely. Replace the access cover.


Fill the Generator with Oil


Refill with the recommended type and amount of oil based on the generator model. Replace oil cap when full.


Run and Check for Leaks


Start the generator and let it run for a minute. Turn off and check for any leaks at the drain plug. Fix leaks if found.


Change the Generator Oil Filter When Necessary


The oil filter should be replaced at every other oil change, or around every 200-300 hours of running time. Always use a filter specified for your Onan generator model. Refer to your owner's manual for full details on maintenance schedules and procedures. Proper care will keep your generator running reliably when you need it.


Replacing the Air Filter in Your Onan RV Generator


A clogged air filter can reduce airflow and the generator's performance. Follow these steps to replace it:


  1. Locate the air filter housing which is typically behind an access panel.
  2. Remove the housing cover and take out the old filter.
  3. Inspect the new filter and housing for any obstructions.
  4. Insert the new air filter, making sure it fits snugly in place.
  5. Replace the air filter cover and secure all access panels.
  6. Replace air filters every 50-100 hours of generator run time. Use a filter specifically made for your Onan generator model.


How to Clean an Onan RV Generator Spark Arrestor


The spark arrestor prevents hot exhaust from exiting the generator. Over time, soot builds up and should be cleaned:


  1. Allow the generator to cool completely before servicing the spark arrestor.
  2. Remove the tailpipe exhaust port cover.
  3. Use a wire brush to scrub the spark arrestor screen inside the tailpipe.
  4. Clear all dirt and debris clogging the screen.
  5. Replace the tailpipe cover when finished.
  6. Clean the spark arrestor every 100-300 hours of running time as needed. Let the system fully dry before restarting.


How to Find the Right Shop for Onan RV Generator Repair


Look for an RV service center that:


●    Specializes in Onan generators with factory trained technicians.

●    Has extensive experience servicing and repairing Onan generators specifically.

●    Offers a warranty on parts and services.

●    Has a good reputation and references from past RV owners.

●    Provides fair pricing and upfront estimates.

●    Can offer timely service appointments.

●    Only use original manufacturer parts to ensure proper operation and compliance.


Contact Mainline RV & Truck Service for Onan Generator Repairs


For expert generator maintenance, repairs, or installation, contact Mainline RV & Truck Service. Our factory trained technicians have years of experience servicing Onan RV generators. We offer quick turnaround, fair pricing, and a warranty on all Onan generator repairs. Contact us today to schedule service or get a free estimate for your Onan RV generator repairs


FAQs

  • What are the most common issues that require Onan generator repair?

    Common issues include starting failures (due to low battery voltage or fuel problems), contaminated fuel, carburetor clogs, and spark plug issues. Lack of regular exercise (monthly operation under load) can also lead to problems. Regular maintenance, such as oil changes and filter replacements, is essential to prevent these issues and ensure reliable operation

  • How often should I perform routine maintenance on my RV's Onan generator?

    Routine maintenance should be performed every 150 hours or annually, whichever comes first. This includes oil and filter changes, spark plug replacements, and air filter inspections. For generators used frequently or in dusty conditions, more frequent maintenance may be necessary. Regularly exercising the generator (monthly under load) is also crucial

  • Can I perform basic Onan generator maintenance myself, or should I see a specialist?

    While basic tasks like oil changes and filter replacements can be done DIY if you have mechanical skills, complex repairs (e.g., carburetor issues or electrical problems) are best left to specialists. Onan generators have specific requirements, and improper maintenance can lead to further damage. Professional technicians ensure correct diagnosis and repair using genuine parts

  • How can regular maintenance extend the life of my Onan generator?

    Regular maintenance prevents common issues like fuel contamination and component wear, ensuring optimal performance. It extends the lifespan by addressing wear early, maintaining efficient operation, and reducing the likelihood of major failures. Well-maintained generators can last thousands of hours (e.g., diesel units up to 20,000 hours), providing reliable power for your RV

  • What specific maintenance tasks should be performed based on the Onan 7000 hours schedule?

    At 7000 hours, comprehensive maintenance is required, including major overhauls such as valve adjustments, fuel system cleaning, and complete electrical system checks. It is also advisable to inspect bearings, seals, and gaskets for wear. Due to the complexity, this level of maintenance should be performed by a qualified specialist to ensure thoroughness and accuracy

Contact Us

April 27, 2026
Stop the "white-knuckle" driving! Learn what causes motorhome porpoising and how professional RV suspension upgrades can restore safety and comfort to your ride.
April 21, 2026
Don't let your RV generator die from disuse! Learn why "exercising" your Onan generator prevents costly repairs and keeps your motorhome ready for the road.
April 13, 2026
Safe stopping is as vital as engine power when towing a heavy load. Many truck owners overlook trailer brakes until an issue arises. At Mainline RV & Truck Service , we handle various towing setups, primarily electric and surge brakes. Both systems stop a trailer safely, but they operate differently and require separate trailer maintenance approaches. Understanding these differences is essential for road safety. We offer an expert comparison, including specific maintenance needs. Understanding the Fundamental Differences Before discussing what keeps them running smoothly, we should look at how the two systems operate. Electric brakes get their power from an electrical signal sent from the tow vehicle. Pressing the truck’s brake pedal tells the brake controller to send electricity to powerful electromagnets inside the trailer’s drum brakes. These magnets engage an armature plate, which then forces the brake shoes out against the inside of the drum. Surge brakes use hydraulics and work on their own, independent of the truck’s electrical system. Their operation is based on inertia. When the truck begins to slow down, the trailer pushes forward into the hitch. That physical pressure compresses a master cylinder built into the trailer coupler, which then pumps hydraulic fluid to the brake cylinders or calipers. Because one system is powered by electricity and the other by fluid pressure, their weak points and overall maintenance needs are very different. Electric Brakes: Fine-Tuning and Electrical Integrity Electric brakes are standard equipment for nearly all travel trailers and large, heavy-duty flatbed trailers. Since they depend on a good connection between the truck and the trailer, maintenance starts right at the hitch and extends all the way to the brake shoes. Adjusting the "Gain" on Your Brake Controller A key part of operating electric brakes is a setting that you control from inside the truck’s cab, not on the trailer itself. The “Gain” value on your brake controller sets the amount of electrical power sent to the trailer brakes. If the gain is set too low, the truck does all the braking work, which leads to your truck’s rotors getting too hot and your stopping distance increasing. Setting the gain too high means the trailer brakes will lock up easily. Routine truck trailer repair and safety checks involve resetting the gain any time the weight of your load changes significantly. A carefully adjusted gain ensures the truck and trailer brake together, preventing unnecessary stress on either vehicle. Troubleshooting "Grabby" or Locking Brakes A common complaint is that the trailer brakes feel “grabby,” meaning they engage too suddenly or violently with only a little pedal pressure. Often, something is causing a maintenance issue. Common reasons include: Corrosion on the electromagnets: If the trailer has been sitting unused, rust can form and cause the magnets to stick when engaged. Incorrect Gain settings: As mentioned earlier, improper calibration is a frequent culprit. Grease on the shoes: A failed wheel seal can let grease leak onto the brake components, leading to unpredictable braking action. During a professional trailer repair inspection, mechanics remove the drums to check that the magnets are wearing evenly and confirm that no oil or debris is contaminating the friction surfaces. Surge Brakes: Hydraulic Health and Fluid Management Surge brakes are most frequently seen on boat trailers (where electrical parts and water do not mix well) and on rental trailers (because the tow vehicle does not need a specialized controller). Checking Fluid Levels for Surge Couplers Surge brakes primarily fail due to low hydraulic fluid. As the master cylinder in the trailer's tongue or coupler is exposed to constant movement, seals wear, and moisture can enter the system. Routine maintenance requires checking the master cylinder reservoir fluid level; dark or cloudy fluid indicates moisture contamination, necessitating a full flush and replacement. Without sufficient, clean fluid, the surge coupler cannot generate the force required to activate the brakes, leaving the trailer brakeless. Inspecting the Moving Parts of the Coupler Since surge brakes work by the physical “sliding” movement of the coupler mechanism, that sliding part must be kept lubricated and clean. If the coupler rusts or jams up, the brakes might stay applied even when you are driving, or they may completely fail to engage when you slow down. The Common Ground: Shoe Adjustment and Wear The way the brake shoes are moved might be different, electricity for one, hydraulics for the other, but the shoes themselves need manual upkeep in both systems. Shoe Adjustment Intervals for Heavy-Duty Trailer Repair While some newer trailers feature self-adjusting brakes, many heavy-duty models still need manual adjustment. As the friction material on the brake shoes wears away, the space between the shoe and the drum increases. The result is a noticeable delay in braking response. For dependable safety, we advise having your brake shoes inspected and adjusted every 3,000 to 5,000 miles. During a trailer maintenance appointment, a technician uses a “star wheel” adjuster to move the shoes closer to the drum. This ensures that the trailer brakes immediately when you press the pedal. Which System is More Maintenance-Intensive? Surge brakes demand hands-on maintenance (checking fluid/grease). Electric brakes risk less obvious electrical failures (wiring, fuses, ground). For heavy loads, electric brakes offer a manual override for sway correction, but require electrical knowledge for troubleshooting. Surge brakes are simpler for the driver but need constant hydraulic system vigilance to prevent failure. Summary Checklist for Trailer Safety Keep your trailer operating at its best by following these simple guidelines: Annual Inspections: Have a certified professional examine your brakes and wheel bearings at least once a year, regardless of how many miles you have driven. Test Before You Tow: Always perform a quick “tug test” to confirm the brakes are working before you get out on the road. Watch for Corrosion: Check the 7-way electrical plug (for electric brakes) or your brake fluid lines (for surge brakes) for any signs of rust or damage. Listen: Squeaking, grinding, or clicking sounds are the most immediate indicators that truck trailer repair is necessary. Contact Mainline RV & Truck Service for Trailer Repair & More! Taking care of your trailer brakes is about more than just protecting your equipment; it directly impacts the safety of everyone sharing the road. If you are struggling with a malfunctioning brake controller, a leaking surge master cylinder, or you simply need a routine adjustment of your brake shoes, the experts at Mainline RV & Truck Service are ready to assist. We specialize in comprehensive trailer maintenance, truck trailer repair, and heavy-duty trailer repair services. Don't leave your stopping power to chance. Contact us online today .
By Mainline Truck Team March 10, 2026
Learn how to identify alignment vs. suspension-related irregular tire wear and enhance safety and performance. Call Mainline RV & Truck Service today.
By Mainline Truck Team March 2, 2026
Learn the importance of air brake winterization in Ohio, along with proven strategies to keep your system functioning. Contact Mainline RV & Truck Service.
By Mainline Truck Team March 2, 2026
Learn what black, white, and blue smoke from a diesel exhaust mean and when you need to seek semi-truck repairs. Contact Mainline RV & Truck Service.
By Mainline Truck Team January 5, 2026
Discover why the 3,000-mile rule is a myth and how to set the right truck oil change interval for your fleet. Contact Mainline RV & Truck Service today.
By Mainline Truck Team December 24, 2025
Learn what to expect from a commercial truck shop, from quick fixes and full services to fleet-focused value. Contact Mainline RV & Truck Service today.
By Mainline Truck Team December 24, 2025
Learn the essentials of heavy-duty truck service that improve performance, reduce downtime, and extend lifespan. Contact Mainline RV & Truck Service today.
By Mainline Truck Team December 22, 2025
Learn how to back up a motorhome with these expert tips, essential tools, and confidence-building strategies. Contact our motorhome repair shop for more.